
Today I’ll be sharing a few tips on How To Create a DIY Raised Herb Garden. But first…notice anything different? Well, if not, I will just tell you. I’ve completely redesigned the blog! I haven’t even made an official announcement yet, so if you’re reading this on its publishing date, you’re officially the first to know! I really wanted to give you a more user-friendly experience when you take the time to visit my blog. I wanted it to be easier to navigate, more aesthetically pleasing, and I definitely wanted to add a larger variety of content. I am still working on content expansion. And coming soon, you’ll see more ideas on not only home decor, but also on fashion, style and DIYS. It’s what you all have asked for, and I’m excited to deliver a new experience for you here at The Mellionaire House.
This blog is sponsored by Better Homes & Gardens at Walmart.
Now, moving on to the subject of today’s blog, How To Create A DIY Raised Herb Garden. Please let me start by saying that (like many of you) I have struggled, more than I let on, with today’s current events. In fact, I’ve honestly been feeling…blue. Practically overnight, I went from having a strong handle on my everyday schedule of being a wife, mother and content-creator, to also being a full time teacher. And, for the record, teaching is NOT my gift. At least not when it comes to teaching my own children. Yep, I said it, and it’s TRUE. They are each highly intelligent individuals, with a large variety of different learning needs. From Day 1, the juggling act was extremely difficult, and I found myself feeling like I was failing in every aspect of my life. And it wasn’t a good feeling.
I learned very quickly that parenting, working and teaching were three different roles that I simply could not do all at the same time. At least, not the way I was trying to do them. I was yelling too much, and snuggling and laughing too little…and it was only the first week of “Safer At Home.”
So I needed to come up with an idea or project that was simple, affordable and creative. Something I could work on either alone, if I needed some quiet time, or we could work on it together, as a family. I decided to expand our small raised herb garden, into one that was bit more substantial. The benefits revealed themselves very quickly, and this is coming from a woman with more of a Brown Thumb than a Green one. In fact, I’ve killed almost every plant I’ve ever tried to grow. But herbs, for whatever reason, seem to be a bit more…forgiving.
Not only does our expanded DIY Raised Herb Garden (not including vegetables too) encourage us to step outside and enjoy the fresh air in the safety of our own back yard, but it also allows us to see the fruits, or shall I say, herbs, of our labor. And the kids really enjoy the lessons of sowing, reaping and harvesting. See, maybe I’m not such a horrible teacher after all. 🙂
It’s really quite simple, and I’d like to share my top tips on how to start your own Raised Herb Garden in just a few easy steps.
Step 1: Choose An Area
One of my favorite things about herbs is that they grow well pretty much anywhere that receives at least 6 hours of sunlight. And even if you don’t have an area that receives this much light, that’s ok too. Certain herbs like Mint or Cilantro, will perform well with just 3-4 hours of sunlight. So whether you live in a neighborhood with single family homes, or if you have an apartment with a balcony, a Raised Herb Garden can fit right in!
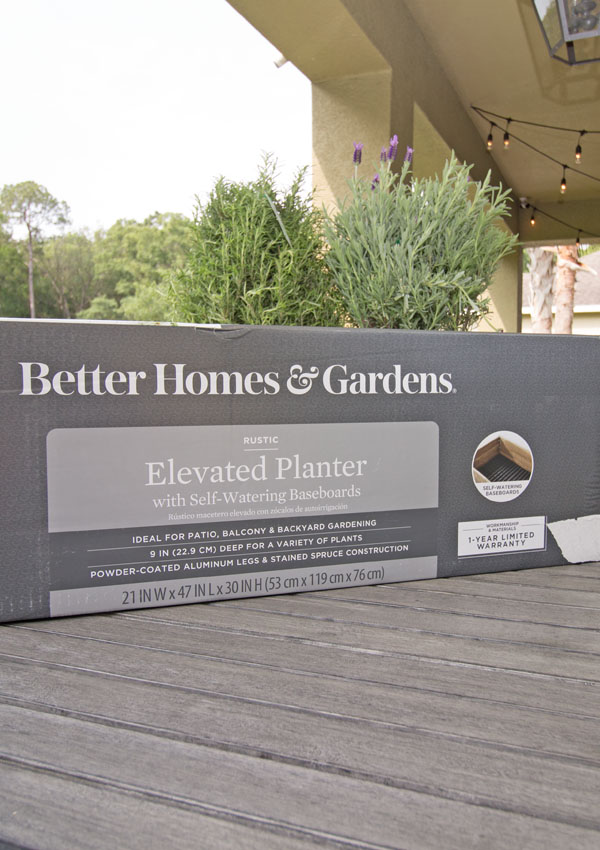
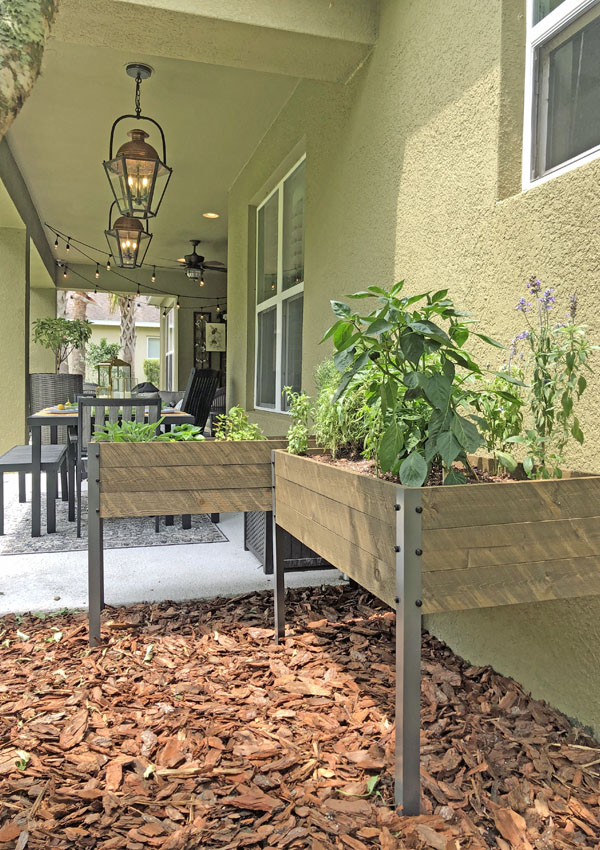
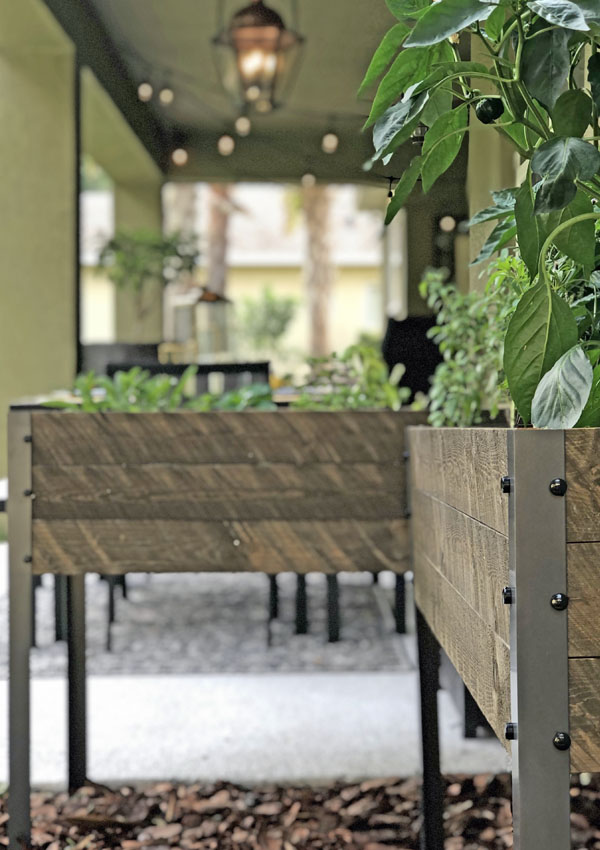
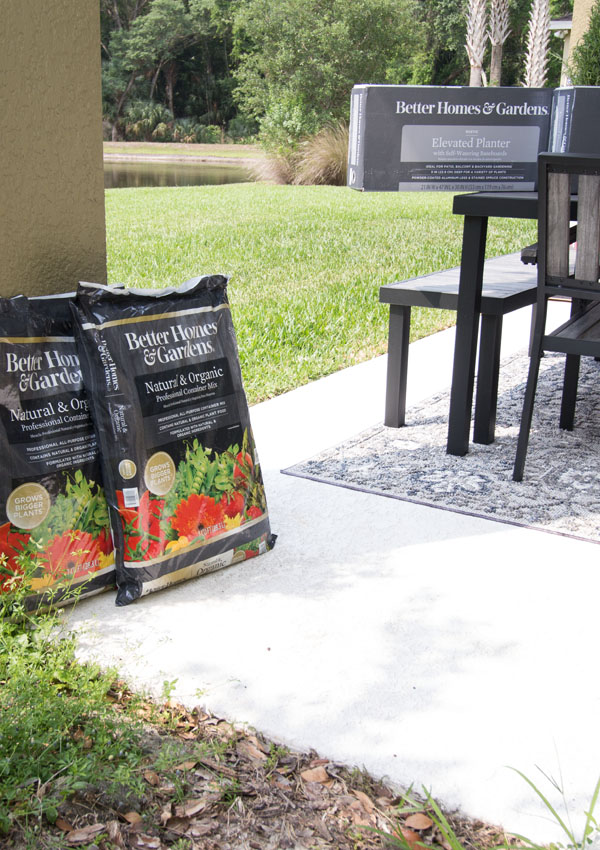
DIY Raised Herb Gardens are also great for those of us with less than ideal soil. For our garden, I chose the Better Homes & Gardens 47” Rustic Elevated Planter With Self-Watering Baseboards. To start, its size makes it perfect for small decks or patio spaces. But since I have plenty of space to work with, I decided to use two of them. This planter also features a self-contained watering system that allows plants to retain the moisture they need to remain healthy. And that’s GREAT for our super hot Florida climate.
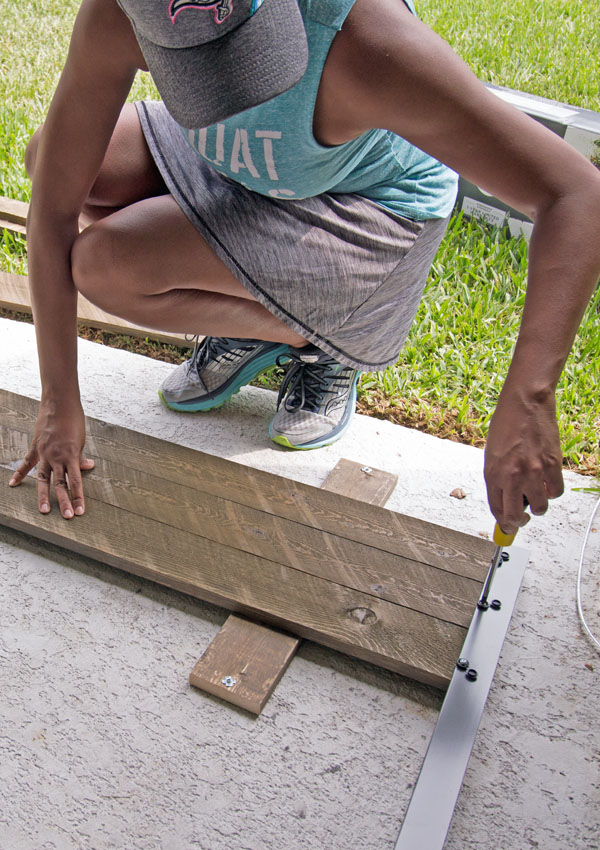
Assembly was simple and the instructions were very easy to follow. I turned on my currently favorite album (any ideas on what it is?), poured some lemon water, and got right to work. I finished in practically no time at all.
Step 2: Choose Your Plants
You can design your herb garden around doing things that you enjoy. We like to cook, so I planted herbs that we use most, like basil, sage, oregano and mint. The mint is AWESOME for my delicious Mel’s Minute Cocktails! But you can also add herbs like lavender to your garden to dry and use in a DIY wreath. Lavender is also great in tea, and makes a wonderful addition to homemade potpourri. The list goes on and on. The idea is to make your garden functional for your home.
In addition to herbs, I planted bell peppers and habanero peppers! The kids are SO excited about this because the visual of watching the peppers grow is quite rewarding. And here’s a small tip…when selecting a vegetable plant, try to find one that already has a few small ones starting to grow. My kids were much more interested in planting those, than the plants where couldn’t really see anything starting.
See our little bell pepper taking off? So exciting!
Step 3: TLC
Now you’ve planted your Raised Herb Garden, and it looks amazing! You’ll want to check on them daily to make sure they are getting enough water. I also find that the type of soil you use to plant in makes a huge difference too. I used the Better Homes & Gardens Natural & Organic Professional Container Mix. This is my first time trying it, so I’ll be sure to give you an update on how it’s working.
Harvest your herbs often. They will grow faster for you if you snip them frequently. I try to harvest in the mornings, and never remove more than about 1/3 of the plant.
And that’s it! So, are you ready to get started? I hope you’ve been inspired by today’s blog. I’ve found it so refreshing and very therapeutic to be in our back yard these days, even in the brutal Florida heat. Next I’ll be planting a couple of new trees, but I’ll save that for another blog.
Until next time,
Love & peace
As part of the BHG Live Better Influencer Network, I am privileged to share awesome tips and inspirational ideas using Better Homes & Gardens at Walmart products. I will receive compensation for my time and effort to create these posts. But as always, my opinions are my own. The convenient shopping links I will provide for you will help support the blog, at no additional cost to you.
These are awesome. I may get one to grow some herbs. My husband built two big ones for watermelons, cucumbers and squash.
That sounds WONDERFUL! I may try watermelon next.
Blessings from Trinidad again i just love it myself..I think that it is such a great idea,love the way it looks neat and just ideal for what’s intended.
I must say that i do admire your incredible qualities,it is so admirable and unique..Keep safe you and your lovely family..Stay blessed?